
Note: Some affiliate links may be used in this post. I may receive a small commission, at no extra cost to you, if you use my affiliate link. Thanks for supporting this site. Full disclosure policy here.

There’s a piece of art kit that you may own, but be under-utilising.
It could be the answer to your fine-line prayers.
Do you ever have difficulty in painting very thin lines, especially long ones? Think grass stems, whiskers on cats, geometric outlines, mooring lines on boats….
If so, there’s a piece of kit that could solve all your problems.
There are various ways to paint very thin lines:
- Fine brush – their very few bristles means they make thin lines but won’t hold a lot of paint, so only suitable for short lines or the paint will run out mid-stroke.
- Rigger brush – longer bristles which hold a lot of paint so more suitable for longer lines. Traditionally used for painting the fine lines of ships’ rigging on marine paintings.
- Sword-liner brush – even longer bristles, so great paint-holding capacity with a fine point. Ideal for the longest and finest lines. (See my Sword-liner brush post here)
Some people, who struggle to paint a very fine line with a brush. feel more comfortable using fine liner pens to achieve very thin lines. This works, but it’s not an option I like, as you end up with a line that’s a totally different medium than the rest of the painting. You can’t change the colour either, so if you want to match a colour they’re useless.
There is another option: a ruling pen. These are often sold solely as tools for applying masking fluid, as you can see here. This irks me, as it doesn’t make people aware of the many other possibilities. A ruling pen will do so much more.
Ruling pens are traditionally a drawing office tool. You may already have come across ruling pen lines on the mounts of historic watercolours. So the ruling pen was designed for making very thin lines of a consistent width, which made it an ideal tool for modifying mounts with watercolour.
You don’t need to stick to watercolour, and you don’t need to stick to mounts. I’ve used a ruling pen with drawing ink, watercolour, gouache, enamel and acrylic ink. As long as you have fluid colour, you can use a ruling pen. This means your medium will match that of your painting, and you can even mix colours to match other parts of your image when necessary.
How to fill a ruling pen
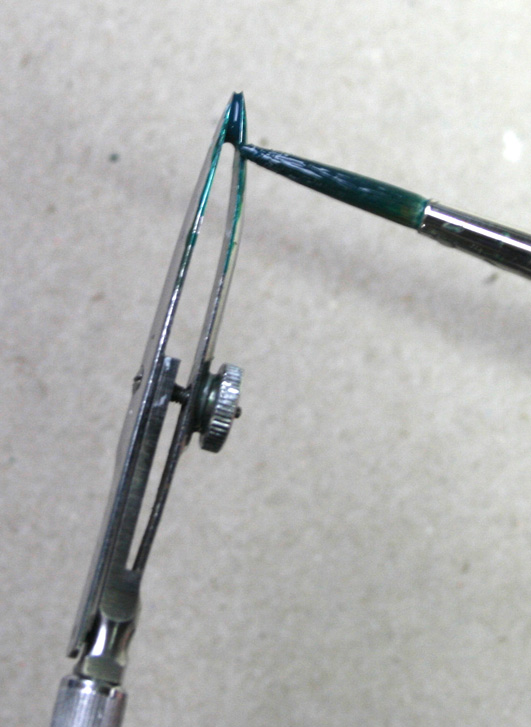
To fill a ruling pen, adjust the jaws with the screw so there’s just a small gap at the tip. Now load your brush with liquid colour and wipe it across the jaws in a direction perpendicular to the handle of the pen. The paint will fill the gap between the jaws. Finally, adjust the jaws to the width you need. Test on a piece of scrap paper in case the colour blots initially.
Dipping the pen into the ink bottle would result in the jaws of the pen being covered with colour that drips onto your work. Definitely not what we want, so do use a brush to fill your pen.
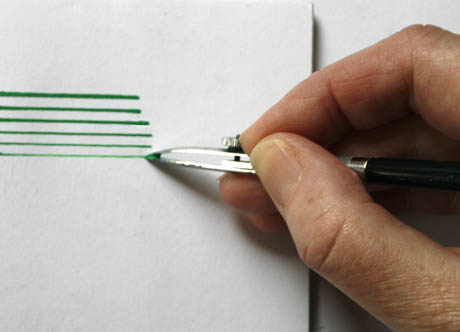
To use the pen, hold it so that the gap between the jaws is facing up towards the ceiling and the adjustment screw is facing away from you. Make sure that both jaws are touching the support, or you won’t get a clean line. Now draw the pen to the right, assuming you’re right-handed.
Try your pen with different media to see you it behaves. Use a ruler or go freehand. Try a way line or a straight line. Make some dots. It’s fun, and you’ll soon find out what your pen will do, and what it won’t.
Line thickness
The line thickness can vary from about 1.5mm to a fraction of a millimetre.
Anything thicker than 1.5mm is problematic, because by then the jaws are quite far apart. You’d need to fill the pen with quite a lot of colour to stop it running out mid stroke, but then gravity causes the paint to drip out of the end when the pen is upright. This risks a drop of colour falling on your work, which is obviously not a pleasing result.
“Use thicker paint!”, I hear you say. You could, but that won’t flow as well as fluid colour. As neither blots nor thicker paint are desirable, it’s better to use a brush for thicker lines and keep the pen for thinner lines.
If you’re drawing a straight line with a ruling pen and a ruler, my top tip is to put a thin piece of card under the ruler. This holds the ruler slightly above the surface so paint doesn’t seep underneath. Yes, I know we rarely use a ruler in art, but there are times when that might be your choice.
Using a mountboard off-cut (the type discarded by picture framers) also works well as a straightedge, as the bevelled edge forms a space next to the wet colour.
We can also use a ruling pen freehand. It takes a little practice to get a smooth line instead of a wobbly one, but it’s perfectly possible as many people are more comfortable using a pen than a brush.
The only slight disadvantage is that the line is of a consistent thickness, rather than tapering naturally as a brush stroke would do. If you vary the speed with which you use the pen, you can vary the thickness slightly, giving a more interesting quality of line.
Ruling pens are great for creating any thin lines, such as:
- Lines to modify mounts
- Detail on ships, trains, buses and cars
- Fine hairs and whiskers on animals
- Architectural detail, such as window frames and stonework
- Plant stems
- Thin lines of highlights, especially on images showing backlighting
- Lettering
- Geometric designs
Some compasses are designed to take a ruling pen attachment, so that’s well worth investigating if curved lines are a feature of your art.
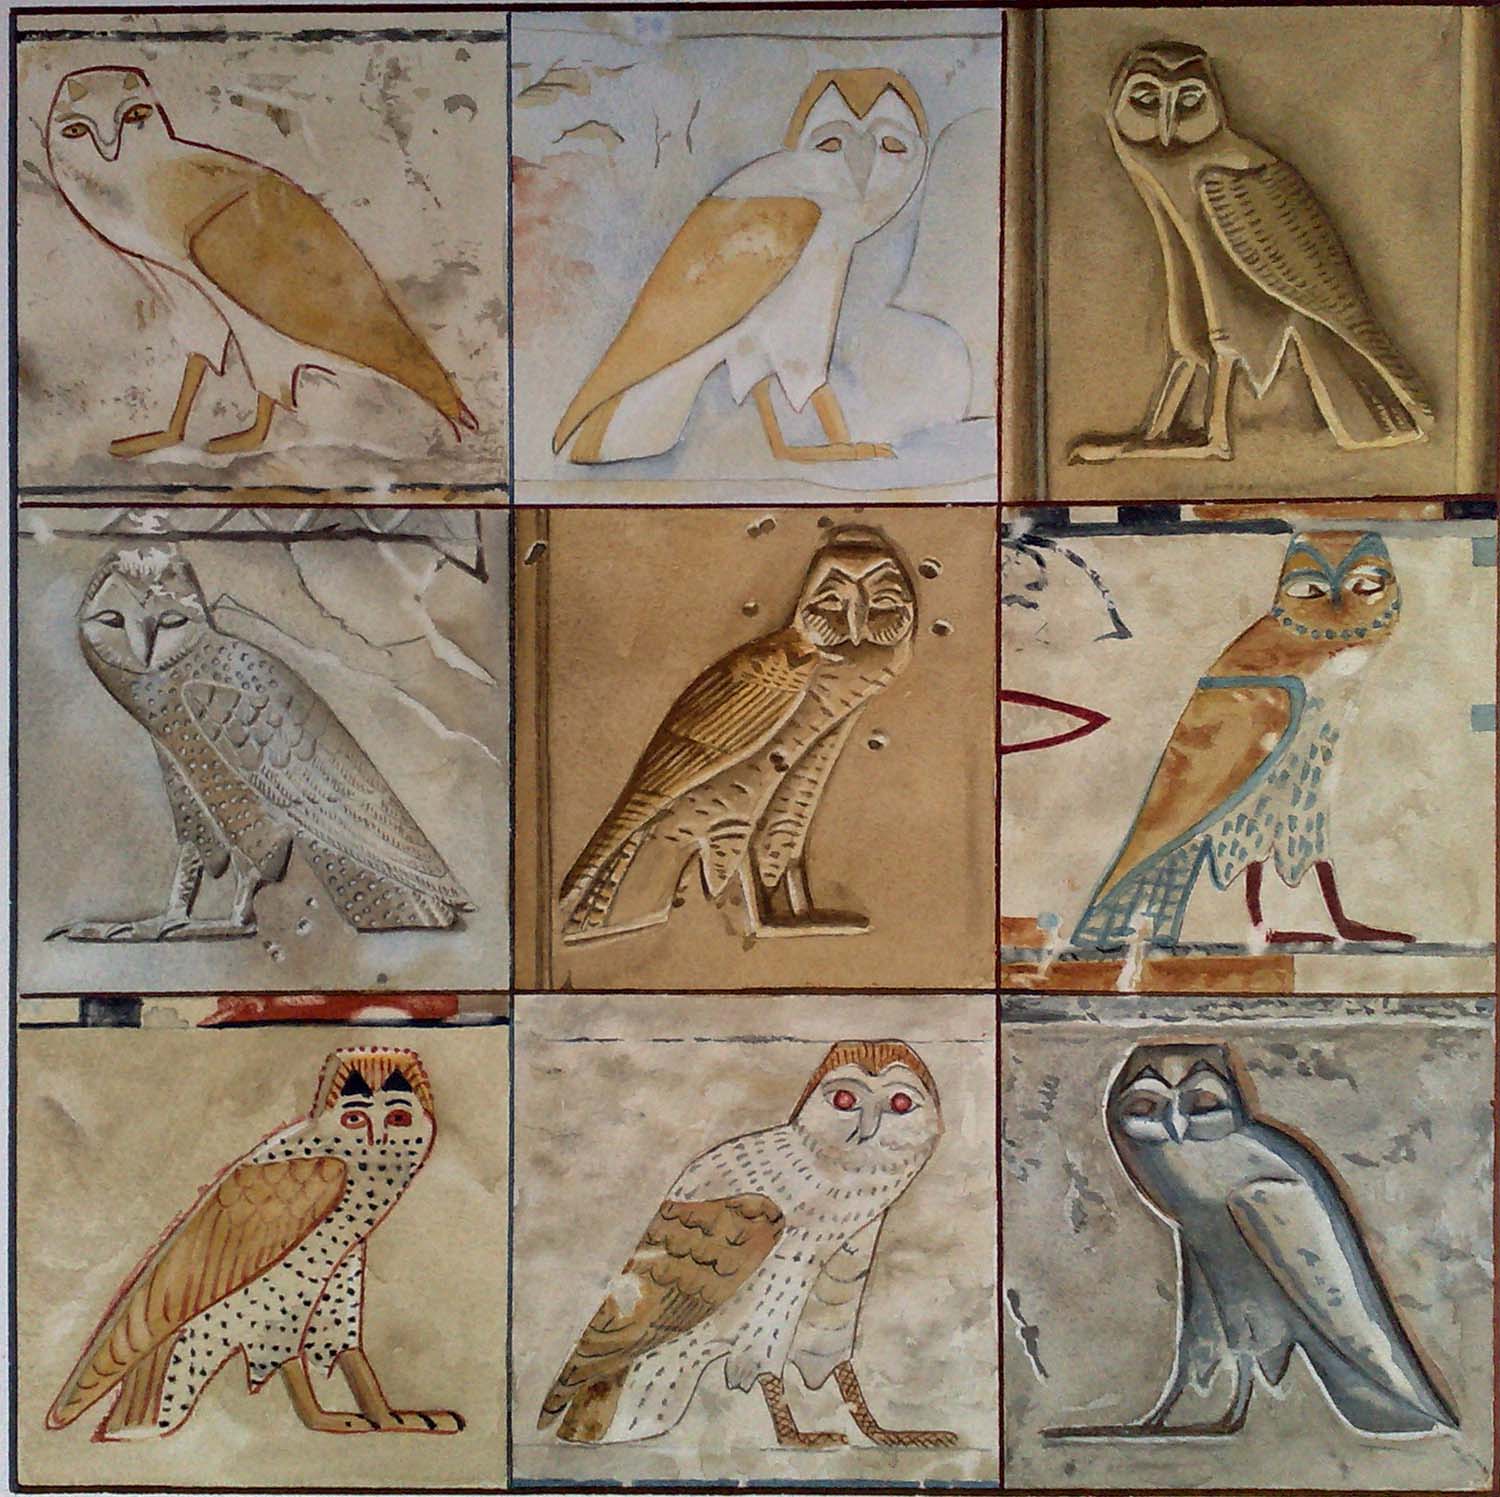
I used a ruling pen, filled with acrylic ink, on this display panel.

Here’s a close-up.
You can imagine this would be a challenge with a brush.
Notice how the width of line and tone can be varied to create a sense of depth.

A good ruling pen is robust and well made. Mine has lasted for decades, so it’s not a piece of kit that needs replacement, unless you treat it very harshly.
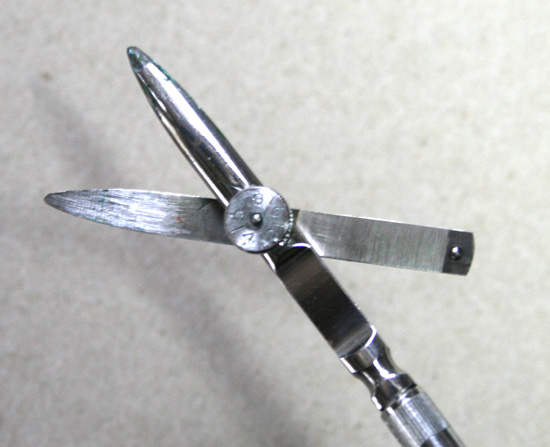
This is a product that won’t break the bank. The budget versions cost less than £5, but if possible I suggest you treat yourself to a better quality, and if possible a cross-hinged version.
Those have jaws that open sideways, whereas the budget versions can only be widened or narrowed. The cross-hinged ones are much easier to clean than the ones where the jaws are fixed. They’re a little more expensive at around £10, but well worth it in my opinion.
Of course, clean your pen after every use, to prevent build up of dried paint. You want the colour to flow cleanly and evenly from the jaws, and it won’t do that if the ends are clogged with dried paint from previous sessions.
The edges and dividing lines in this painting needed to be very precise, so I used a ruling pen with watercolour. I’m glad I didn’t have to make those lines with a brush!
More top tips
- Load your pen away from your work. If it drips or spatters it won’t damage your work.
- Use a Flow Medium with acrylic to help the colour flow if you don’t have acrylic ink.
- Test the colour and the line thickness before you start work on your actual painting.
- Treat your pen with care. Chipped or damaged jaws will result in a patchy line. So keep it separate from your pencil case, preferable in a protective case.
- Load your pen with colour and then with a second colour. The line will change gradually from the first colour to the second.
I hope this post has been an eye-opener if fine lines have been a struggle for you. A ruling pen isn’t something I use for every painting, but in certain circumstances it has been far and away the best tool for the job.
Oh, and you can also use ruling pens for masking fluid.
Like this Post? You might like these too:
- How Do I Use a Sword-liner Brush?
- What is a Fan Brush Used For?
- Sketching With Pen – more than a simple line drawing.
- Watercolour Paper – the Differences Explained
- Liquitex Pen Cleaner – Product Review
Have arty friends who might enjoy this blog? Please recommend it to others.


I appreciate this briefing. I recently started using a ruling pen with India ink to mark on clear acetate, and was curious about using acrylic ink as well. Thank you for explaining the many uses of this versatile device.
A ruling pen can be used to draw accurate lines and curves of different widths in conjunction with a ruler, french curve, compass, and other tools.